Saturday, July 28, 2007

Friday's Feast

Hosted By Friday's Feast


Appetizer
Describe a toy you remember from your childhood. The “He-Man” “Castle Grey Skull”, that folded open, with the wolf head microphone, that turned your voice into Skeletor's

Soup
On a scale of 1 to 10 (with 10 being highest) how observant are you? 9…or just a little more observant than Carrie…although she may not agree…LOL

Salad
Where would you rather be at this very moment? Snuggling with Carrie

Main Course
When was the last time you learned something new? Today; that Sun Tzu’s theories are mostly true!!!

Dessert
Fill in the blank: I have lived in Italy for 2-1/2 years but I haven’t been to Rome!!!.

Sunday, July 22, 2007

Gear Up - Combat Duct-tape

"How to fit a roll of Duct Tape ANYWHERE???"


Combat Duct Tape...A.K.A. 90mph tape. I saw a retail version of this at base supply one time, and thought "I can make one of those!" Ever been out in the trenches, at the camp ground, or on a trip, and needed some duct-tape? To bad you can't carry a roll of that in your field-gear...not comfortably, anyways! So the "Duct-Tape" guys got smart and made a "compact roll" you can carry with you, in your field gear...comfortably!!! IF you know the "guys". But if you don't, here's how to make your own roll of "Combat Duct-Tape"


"Combat Duct Tape...small enough to take anywhere!!!"


Get a sturdy piece of cardboard (fiber board actually...the thin, sturdy stuff...not "corrugated"), and cut it to about 4" long. For the width, cut it just a little thinner than the tape itself. Then, start wrapping the tape around the board, length wise, making sure to keep it taught as you wrap. Do this about twenty/thirty times ,or until the tape is about 1" thick. Now you have a "roll" of "Combat Duct-Tape that will fit in your LC-1 Compass/First-Aid pouch, back pack, Individual First Aid Kit...or just about anywhere!!! I keep one of these in one of my Compass pouches on my LBV, CFP-90, and ALICE Pack, along with some zip-ties and 550/220 cord, as my "Quick Fix/Repair Kit" while in the field.

"Combat duct Tape in an LC-1 Compass/First-Aid Pouch"


Please comment on my blog, and let me know if this was helpful....or maybe you just thought it was neat! Thanks!!!

Friday, July 20, 2007

Firday's Feast - July 20th, 2007


Appetizer
On a scale of 1 to 10 (with 10 being highest) how much do enjoy watching sports on television?

Football: 10; Everything else: 0

Soup
If you could completely memorize any one work of fiction, which one would you pick?

The Hobbit

Salad
What is your favorite breakfast food?

Biscuit's and Gravy!!!

Main Course
Name something fun you can do for less than $10.00.

Snuggle with Carrie!!!

Dessert
How long does it usually take you to fall asleep?

Sleep? What's that? LOL! Actually, about 2 minutes

Hosted by: Friday's Feast

Saturday, July 14, 2007

Going Places - Rauforhollshellir, Iceland

"Route 39"


"The Detour"


This week, we're going spelunking in the tiny island country of Iceland ("Eess-land" in the native tongue). Raufarholshellir is located about 20 minutes from the capital, Reyjkavik, and is the second longest Lava Tube System in Iceland. To get there, just follow Route 39 from the capital to the harbor (ferry) town of Thorlakshofn. Just as your coming down the mountain, right before the town, it will be on your left, as you come down the first main curve, in a little gravel pull off. If you pass a large black hole in the lava field, you need to turn around!


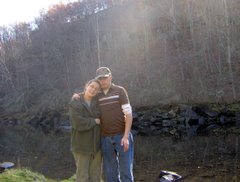
"My bud, Rich, at the entrance"


As you enter the cave, you'll notice giant "holes" in the ceiling...as the lava left the tube, it created a "vacuum", and sucked the "undried lava" out, leaving a giant hole in the earth...hence the cave! Notice the mounds of rock under the holes...yep, you have to maneuver over what once was the ceiling!


"Me, posing at the second hole...notice the pile of boulders behind me!"


After you pass under the third hole, you'll start to notice the total blackness...hope you came prepared...check out my "Gear List" at the end of this post! Then the descent begins...note...although July/August is the best time to go, there's always ice in the cave, so watch your footing!!! As you start, the real beauty of the caves begins to show itself...Ice Formations (not really icicles, as the ones here are formed on the floor...upside down icicles if you will....ranging from 6 inches to 6 feet!!!


"Journey To The Center Of The Earth"


The first part can be pretty ruff, with 8-12 ft boulders to maneuver, through narrow openings. After that, you enter the first of three(?) of the bigger chambers, where you'll have to go around or over enormous piles of boulders, ranging from 6 inches to 5-6 feet, and if you shine your light on the ceiling, you can see how they got here...don't worry though...most of these fell when the cave was rather young, and the lava was cooling off and cracking. Make sure you go around at least one of them...if you look on the bottom, on the side, of the cave, you'll see all this glittering stuff...you may think it's just dew that accumulated on the moist rocks...it's actually a silver "dust" that stuck to the top layer of the lava when the cave was forming, and has a BEAUTIFUL, glittering appearance!


"Shimmering Walls of Lava..."


Then comes the best, though be it those most confusing, part. This is where my Invoa 24/7 came in handy...after my first trip here, I realized the back of the cave split into three LARGE caverns...and after being in the dark for three hours, you begin to lose your sense of direction....so I set this up on "Strobe: mode, at the "entrance" to the leg that led out of the cave...and believe me, it saved me wandering around for thirty minutes the second time, trying to figure out which way to go!!! The tunnel to the right is by far the neatest, as you have a "Lava waterfall", "frozen in time" at the back, with glimmering wall, and lava drippings hanging from the ceiling.


"The Lava Water Fall"


The middle and left leg actually connect, through a small split in the rock...however, using the far left is a little more risky...as you approach, you'll notice the only "graffiti" in the cave...a yellow arrow and the words "atchung" spray painted on a 10 ton slab "dangling" from the ceiling, about half-way through the left leg. And to the back, you'll get to see how lava really comes out of the ground...it's kinda weird....it's almost like mother nature beat herself...as powerful as lava is, and the tectonic plates, it seems it wasn't enough to beat off the harsh cold, and the lava monster was defeated, frozen in time, for us to get a glimpse, or an idea, of her power, from birth!


"Lava, creeping from the earth, frozen in time..."


Going to Iceland was a wonderful experience...everybody knows about it, but everybody decides to go to to Mainland Europe instead...your missing a "diamond in the rough"!!! I've been to six European countries, including Italy, Austria, England, and Turkey...Iceland, by-far, is the most beautiful!!!

The lava tubes of Iceland isn't where my caving started, but it's definite;y where it took on a whole nother meaning for me...I've been looking for bigger and better caves since, with an unmatched passion for the beauty of going into the belly of the earth, and possibly where no person has stepped before!!!

Here's some of the gear I used on this "expedition" (my choices were a little more limited then)

-Carharrt Jacket (although I had to take it off half way through, due to the strenuous climbing, once inside the cave)

-Foxfury Signature Outdoors; 24 LED Headlamp...stadium lights you can wear on your head!!!

-Road flares (for the larger caverns)

-Flight Gloves (I have to keep my dexterity)

-Inova 24/7 to find my way, and my gear, in the cave

-Rayovac Outdoorsman Headlamp (great for a general purpose light)

-And of course, my Surefire G2 Nitrolon...when I really needed to see something, this was my "go to light"


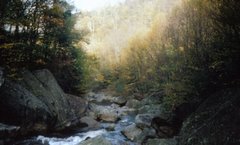
"The road to Civilization"


Cave Stat's:

Length: 4,350 ft. (.82 mile)


Width: 30-90ft


Height: 30ft


Lat: +63° 55' 58.80",


Long: -21° 24' 0.00"


Wednesday, July 11, 2007

Good Gear - Gerber Meridian

This "Good Gear" Review covers the Gerber Meridian. This here is my favorite headlamp...while it's not the most powerful or durable one I own, it is the most versatile, and funnest to use. This head lamp has 4 main things that set it apart from MOST headlamps, including just about all the regular one's you've seen at your typical department store's...


1. The best thing that sets this apart is the white LED...this bad-boy has a 1-Watt LED which is ten times brighter than the LED's found in your run-of-the-mill headlamps. (Why do you think those headlamps have so many LED's...4...6...or even 10? Because they're the low-end, and don't produce enough light). With LED's, a good 1-watt is way better than ten .23-.46 watt's...you may have good area lighting with those one's , but if you need to see anything further than the other side of the yard, you'll need an LED rated at least 1-watt.

2. It has an integral Red and Green Light, that function independently...so, yes, you can have the White and Red or White and Green lights on simultaneously. One switch turns the white on-or-off, and the other turns the red and green on-or-off. Red LED's are pretty common on headlamps, but not green, which just adds to the versatility of this.


3. The Red LED also has a built in strobe function, and because of the independent circuitry, you can have the strobe light going, while still being able to use the main LED!!!

4. The lights have independent switches, unlike most headlamps, which saves you from having to cycle through the different colors. One switch operates the white light, while a separate switch operates the red and green lights!


Over all, this is a really nice headlamp, even though it may be shaped different than what most people are used to. Quality construction, with a three position head-band, makes a very comfortable fit, with-out being to bulky. While not completely waterproof, it is weather proof (water resistant), and can take a light rain, or a quick drop in a puddle, with-out being destroyed. Runs on 3-AA Batteries...and because the lights are LED, they run for a very long time on one set of batteries...day's, not hours!!!

Now, if it were only water-proof, it would get a 10 out-of 10, but then it would cost more...so, it's an awesome headlamp for the price, and gets a 9 out-of 10. When, or IF mine breaks, I will definitely get another one! I actually wouldn't mind getting another one now, to have two!!!


Cost:$40-$45

Lights: 1 White, 1 Red, 1 Green LED's

Color: White, Red, Green

Out-put: 30 Lumens (1-Watt White LED)

Range: Approx 100ft. (1-Watt White LED)

Functions: Steady White, Steady Green, Steady Red, Strobe Red

Power: 3-AA


Monday, July 9, 2007

Gear Up - The Ultimate Knife/Tool Combo

Here's one of the best "Gear Combinations" I've seen...Not sure where I ran across this, but once I did, I thought "That's a heck of an idea...why didn't I think of this?". Take one of the best "Survival Knifes" and put the best multi-tool in it? It utilizes the USAF 499-Survival Knife (the sheath, anyways), by Ontario Knives, and The Leatherman Micra.

To do this, you need to remove the sharpening stone from it's holder on the front of the sheath, and replace it with a better survival tool...the Leatherman Micra. If your stuck out in the wild long enough to have to sharpen your knife, then sharpening it is the least of your problems to begin with. I've tried the same thing with my USN-1 SP-24 Pilot Survival Knife Sheath, but because it's plastic, it doesn't take the Micra very well.

Just place the Micra (with some 220# Cord attached...another great survival tool by the way!!!) in the sharpening stone pocket...

...and when you take off from camp with your knife, or just have a SNAFU, you'll always have two valuable tools, and won't even notice that your packin' one of them!!!

Oh-Yeah, since this is my first "Gear-up" label, please let me know if you liked it, or if it helped...Thanks!

Sunday, July 8, 2007

Going Places - Lost Valley Arkansas


I'll start my first "Going Places" Label with one of my favourite places in my home state. Lost Valley is a small state park in Northern Arkansas. This neat little hike is tucked away in the western part of the Buffalo River National Park. There are plenty of awesome rock formations and several "glades" with waterfalls.


The trail starts off rather easy, and not far up the trail are two beech tree's that have started growing together, and make for a nice little photo op. Not far from that is where it starts getting really breath-taking (although the hike gets rougher). You come to some rather large boulders, and then the first glade, with a 100ft. cave at the back, with a water fall running through the center. This is a nice place to stop and take some pictures and get a breather, before going into the first real cave.


"Me and Carrie taking a break...and a picture!!!"


"Into the abyss..."


Past this area is the first "real cave"...this a small lava-tube, with a small channel of water coming through it...this one goes back about 300ft., and ends in a small room, before the lava tube get's to small. A rather interesting (if somewhat cramped) spelunking experience. Make sure you're not claustrophobic!!!

As you get to the back of the trail you'll come to "Cob's Cave", named for all the corn cob's they found that the Native Americans left, when they abandoned the Gargantuant overhang...this place is big enough for a small village!!! The green cirle is my sister...this gives you an idea how big the the cave is!!!


"Cob's Cave"


Then you get to the main attraction...Lost Valley Falls. As you get to the back of the valley, you'll notice the trail veers off in two directions (with Cob's Cave to the right). If you want to get to the main cave, you'll have to take the high-road...Literally!!! Following the trail that goes up to the left will take to you the main cave...but be careful, as the trail itself is pretty steep, with lot's of loose rock...not too bad...just make sure you cling to the left side of the rock face. Once there, you'll have to navigate your way into the cave entrance, with lot's of water, and some slick areas...just check your footing as you go. Break out your flashlight or headlamp and make your way to the back!!! About half way back, the cave narrows to a big mouth...about 14ft. wide, but only 2-3ft. tall...at which point you'll have to crawl (this is where those knee/elbow pads come in handy) for about 50 ft. Then, it opens to a small pool, into a big cistern about 75' tall, with a waterfall coming from a hole in the ceiling!!! There's a better way to get to the back, where you don't have to crawl, but it's hard to find...it is on the right side of the cave before the mouth...much easier if you can find it!!!


My sisters at the back of the main cave,


with the waterfall coming out of the ceiling...


Me, at the entrance to the cave


Well, if this inspires at least one person to go see this wonderful piece of God's creation, then it will have served it's purpose...if not, enjoy the story and the pic's, and check out my next "Going Places" post next week...until then, ciao!!!

Here's my recommended gear list for this trip:

  1. Flashlight/Headlamp...or both!!! (waterproof recommened...see Pelican Lights)
  2. Camera (who wouldn't?)
  3. Shoes with good grip
  4. Knee/Elbow pads (recommended...not necessary though)
  5. Gloves (I prefer flight gloves...other than being light and breathable, they still protect your hands with out holding alot of water)
  6. Backpack (for all your gear)
  7. Water (in your pack), or Camel Back...Arkansas can get hot!!!
  8. Some Cyalume Light Sticks for marking yourself/friends/family, or for marking other paths in the cave...just make sure you don't leave any trash!!!


Saturday, July 7, 2007

Good Gear - Inova 24/7


I'll Start my first "Good Gear" Gear Review, with one of my favorites; The "Inova 24/7". These things are so neat, I own two of these contraptions. I got my first, the basic yellow one, while I was in Korea, and loved it's versatility. As soon as they came out with an olive-drab one, I had to get it! Now I have one to wear with my uniform (and still look proffesional)...so now I own two!!! It's Basically an eight function LED (Light Emitting Diode), that fills about 50 roles!!!


1. Steady Low (Low White); Just enough to find something at night or read a map
2. Steady High (High White); A little more power for when you REALLY need to find something
3. Strobe (High White); This is great for finding your way back to your campsite, or marking a junction in a cave.
4. S.O.S. Strobe (High White); If your lost enough at night that they have to send a chopper to find you, this function sends 3 short and 3 long bursts of high white light, so the rescue team can see you (from up to two-miles away!!!)
5. Emergency Flasher (High White, Red, and Yellow); attach this to the back of your broken down vehicle (with the magnetic mount that comes with the accessory pack) to keep people from hitting you on the road at night.
6. Caution Light (Red/Yellow Strobe); Use for No. 5, or to mark off a dangerous work area to let people know to "be careful"
7. Red (Steady Red); Use this to conserve night vision or for stealth operations (red light diffuses alot faster than white, and so, is less visible from a distant, and won't damage your night vision equipment like white light). This also conserves battery power, as the red light can light up the same area from the user's view with-out using as much battery power as white light.
8. "Find Me" (Low Red); This function sets the red LED's to blink at about 10-15 second interval on very low power, making it easier for you to locate it in a dark area (closet/footlocker/tent), with-out draining the power on your batteries. Even though the flashlight will run for MONTHS in this mode, I would only set it when I go on a camping trip or something...when I might "unexpectedly need it".

The light comes with a neck holder that clips onto the metal clip, permanently attached to the light. The metal clip is perfect for attaching the light to the pen pocket on your BDU's/work shirt, for hands free operation. (Now, if I could just find out a way to attach this to my PASGT Helmet???)

An "accessory pack" is also available (which I still need to get, but just haven't yet), that comes with a wall mount, a magnetic mount, and a head-strap. Overall, this light is tough, and versatile...great for anybody that may have a job that falls into the Military/Industrial/LE category, or just likes spending times out-doors and wants a light that will do everything and then some!!! Special versions are available for police (with Red and Blue LED's with a"take down" flashing function), and a military version as well (with IR LED's).

I only wish it was little more water-proof!!! You can get it "wet"...just don't use it for a diving light! That, however, is the ONLY drawback...with it's tough construction, and LED light, this thing will take ALOT of damage, and last for a LONG time (LED's have a life of about 100,000 hours...that's 4,166 DAY's!!!...when do you ever really have a flashlight on for more than 5 minutes?)

I've had mine for about 4 years now, and still use them ALOT!!! If you need (or want...LOL) a light like this, it a good deal at $35-$40. It get's a 9 out 0f 10...if it was only "submersible"!!!